

How To Use The Select And Mask Tool In Photoshop
The power to create masks in Photoshop is ane of the cadre features that allow for layer-based photo editing.
In this tutorial, we're going to bear witness yous how to use the Select Subject tool to create a mask in Photoshop. We'll as well show you a trick to create a more complicated mask. Let's get started!
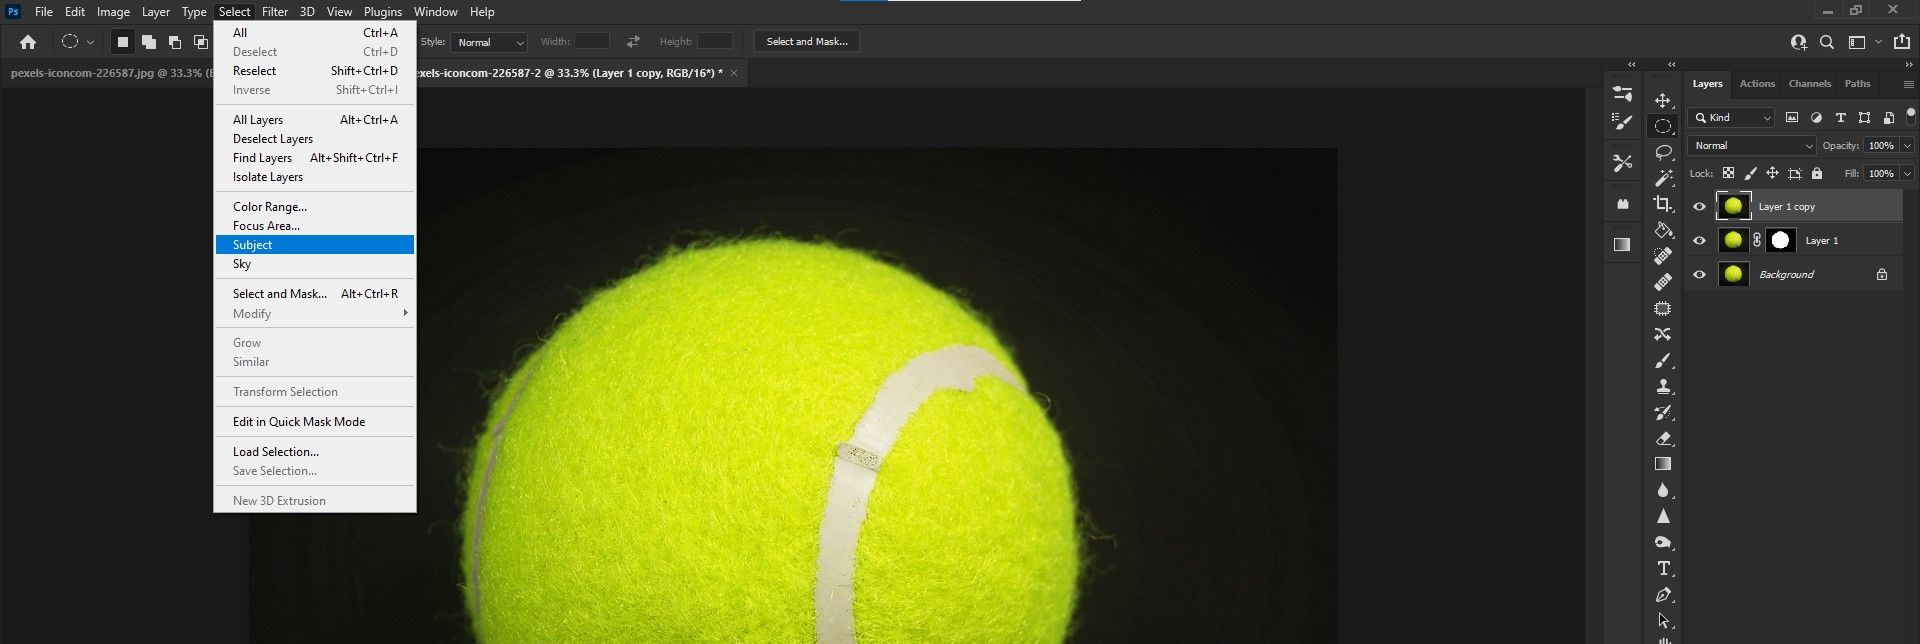
To access the Select Discipline tool in Photoshop, go to Select > Subject at the top of the bill of fare bar.
You can also access it if you're already using the Object Selection, Quick Selection, or Magic Wand tools. With these tools active, you volition see Subject Select and Select and Mask as options at the top.
Getting Familiar With the Layout
Before we dive into the fun role, permit's have a look at the tools, modes, features, and settings that volition come up in handy when you're creating masks.
When y'all enter masking mode later on choosing Select and Mask, there are 3 menus to work with. The one on the left contains the selection and navigation tools.
They include the Quick Selection tool, Refine Edge Tool Brush, Brush tool, Object Choice tool, Lasso tool, Hand tool, and Zoom tool. Each of these has a specific awarding and works in tandem with the other menus.
The Properties Console
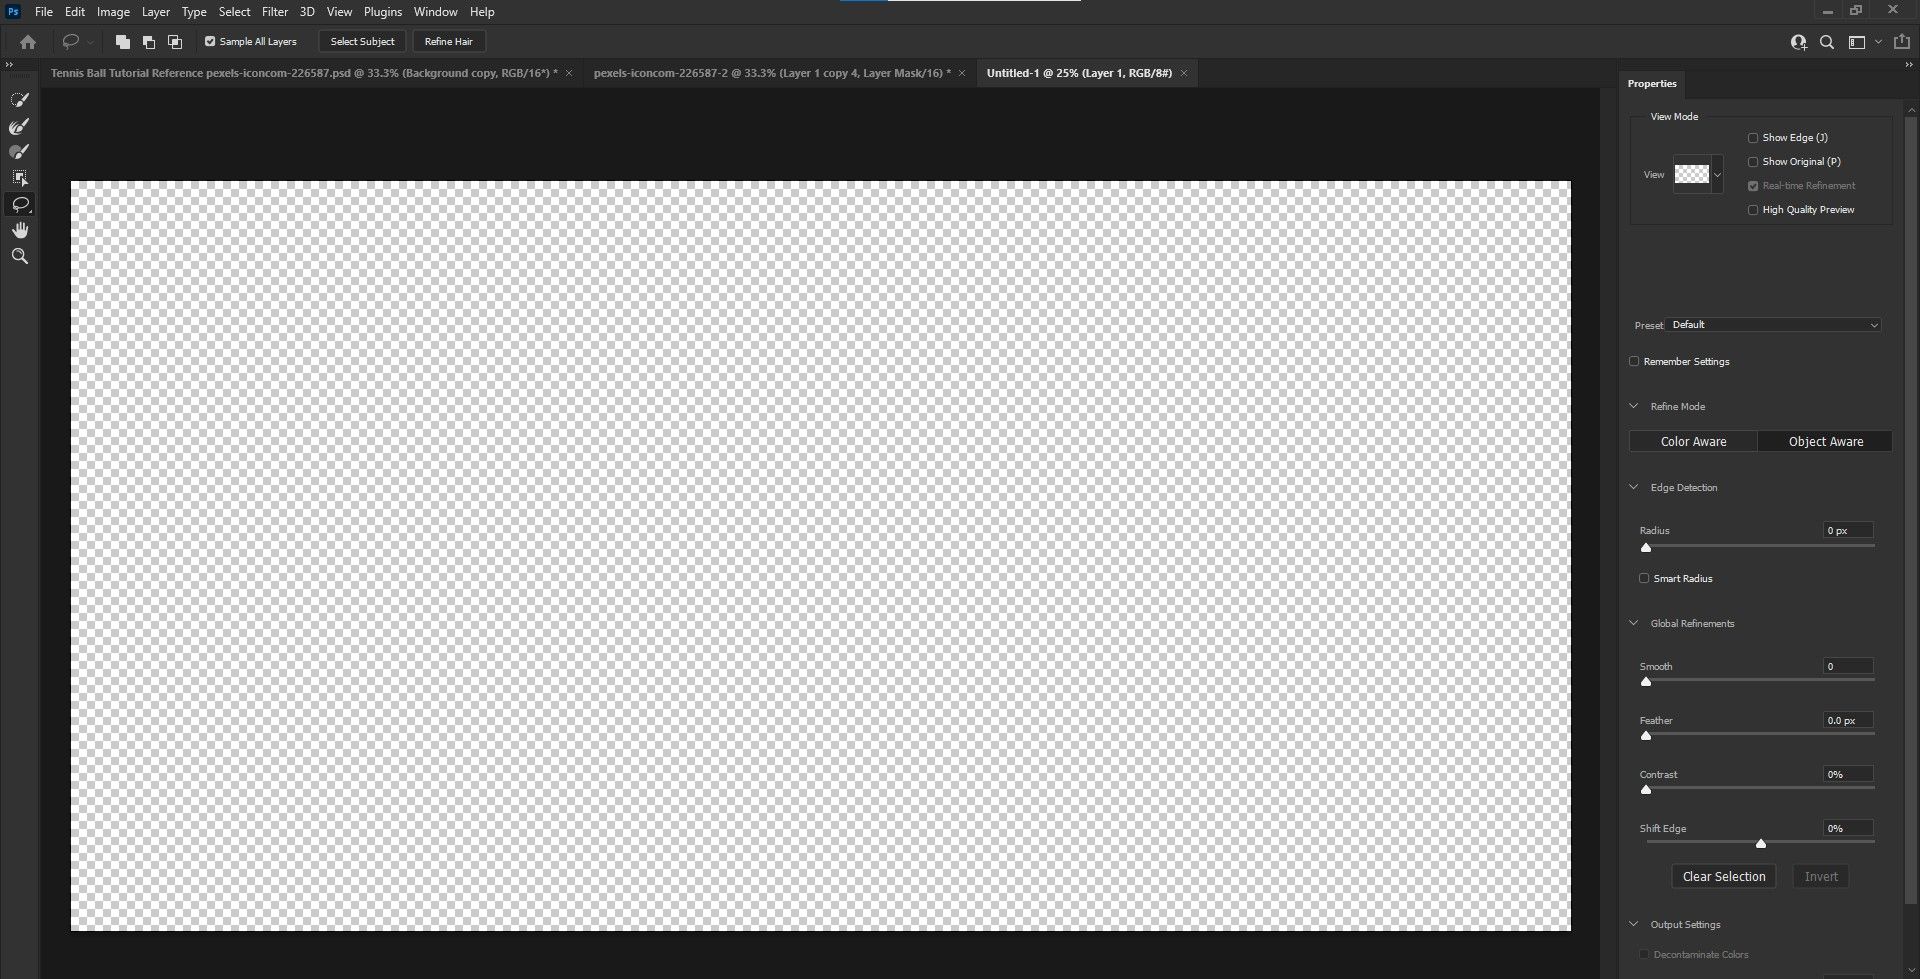
The properties panel is where the localized and global adjustments are located. Most of these features are located on the left under Properties. At that place are two options on the peak bar too, namely Select Subject and Refine Hair.
View Manner
In View Fashion, you lot determine the best view for creating your mask. There are preview options such as Evidence Edge, Prove Original, Existent-Time Refinement, and Loftier Quality Preview. The colour and opacity can also exist adjusted here.
Refine Way
In Refine Mode, there are 2 options: Color Enlightened and Object Aware. Either ane tin be used to refine your mask.
Edge Detection

Edge Detection tells Photoshop how to process the edges around the masked subject. For example, you can extend the border past turning the slider to 250 pixels. Checking the Smart Radius box tells Photoshop to shape the edge co-ordinate to the precise contours of the subject.
Global Refinements
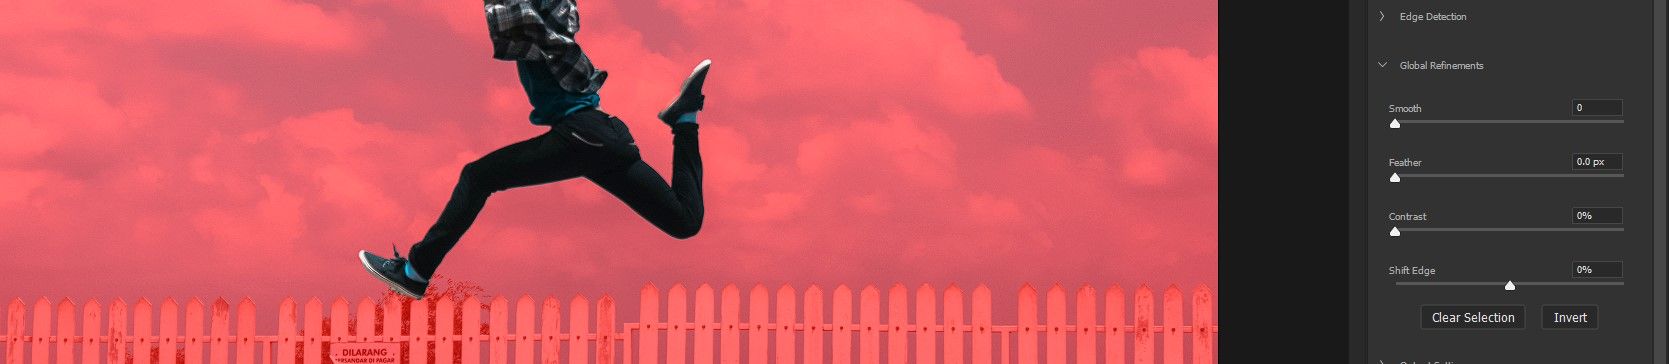
Global Refinements may be needed for some masks and not at all for others. The four sliders include Smooth, Feather, Dissimilarity, and Shift Edge. There are 2 additional options to Clear Choice or to Invert the mask.
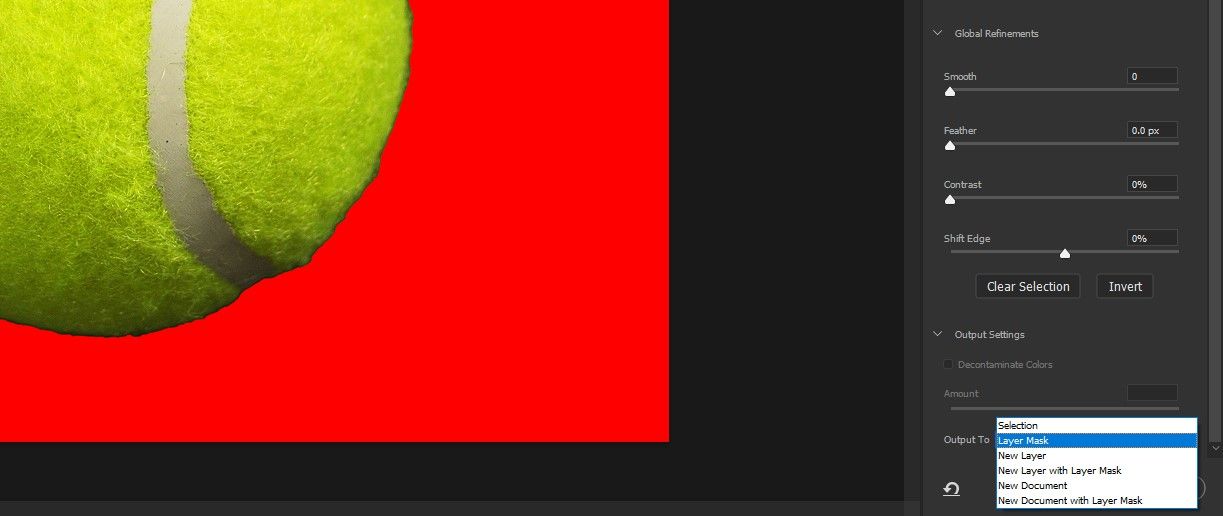
Output Settings

The Output Settings are important because it determines how the new mask is applied to your paradigm. Your options are Layer Mask, New Layer, New Layer along with Layer Mask, New Document, and New Certificate along with Layer Mask. There is as well a box option to Decontaminate Colors.
How to Create a Mask With Select Subject
For this example, nosotros're going to mask a tennis ball. You can download the image from Pexels if you lot'd similar to follow along.
Masking a round lawn tennis ball may seem similar an easy job at first glance. But near tennis assurance aren't perfectly circular. Plus, they accept $.25 of protruding fuzz. This makes it near-impossible to create a realistic-looking mask in just one click.
Let'south await at how the Select Subject tool will assist united states of america mask this tennis ball:
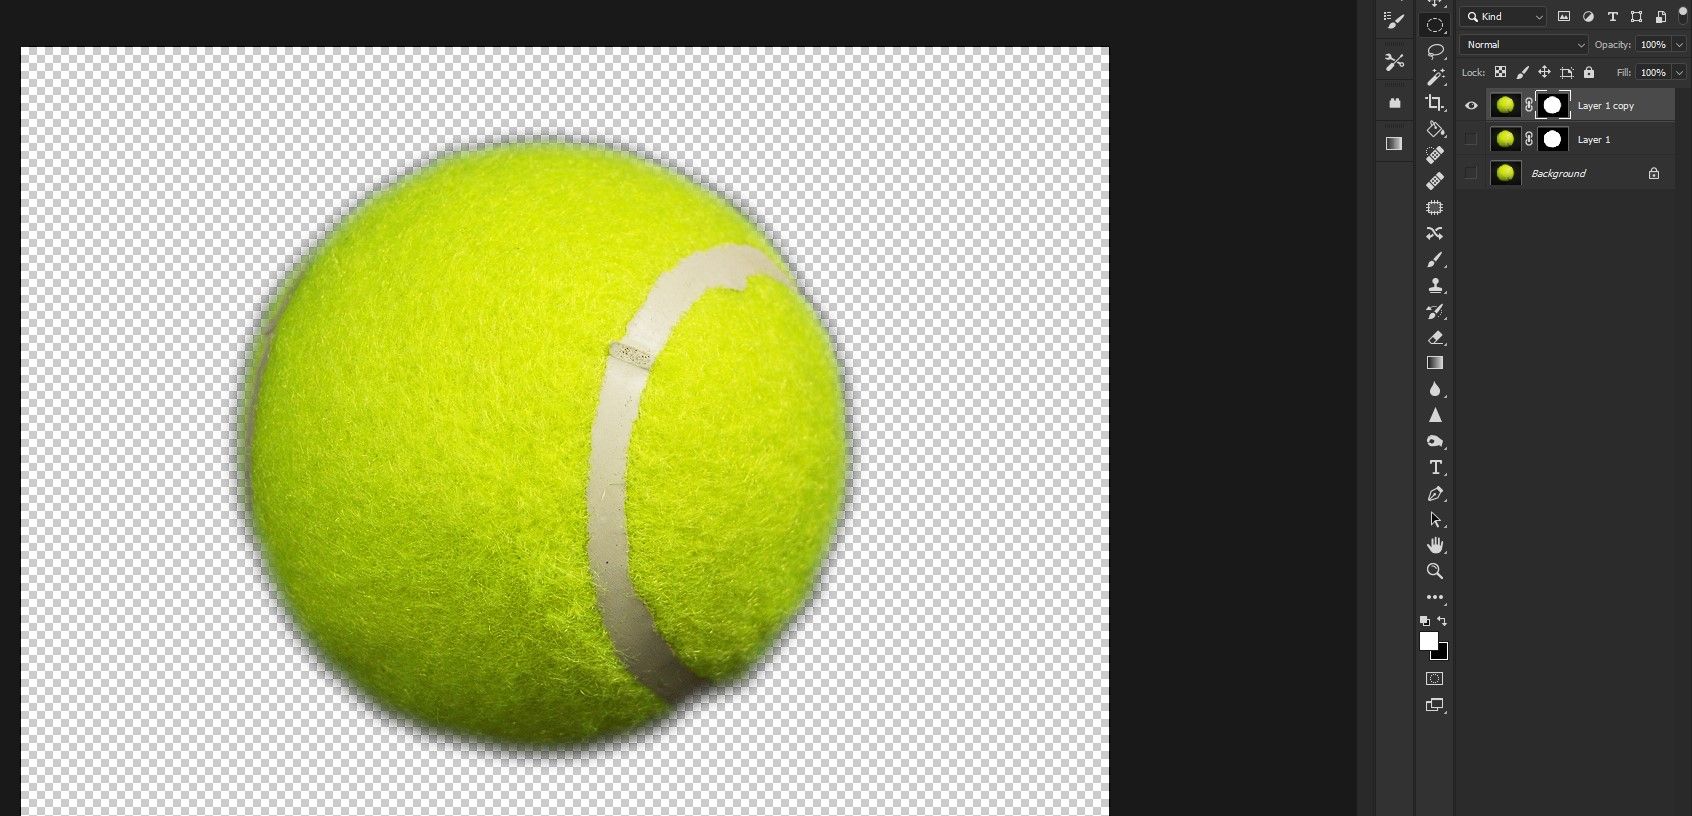
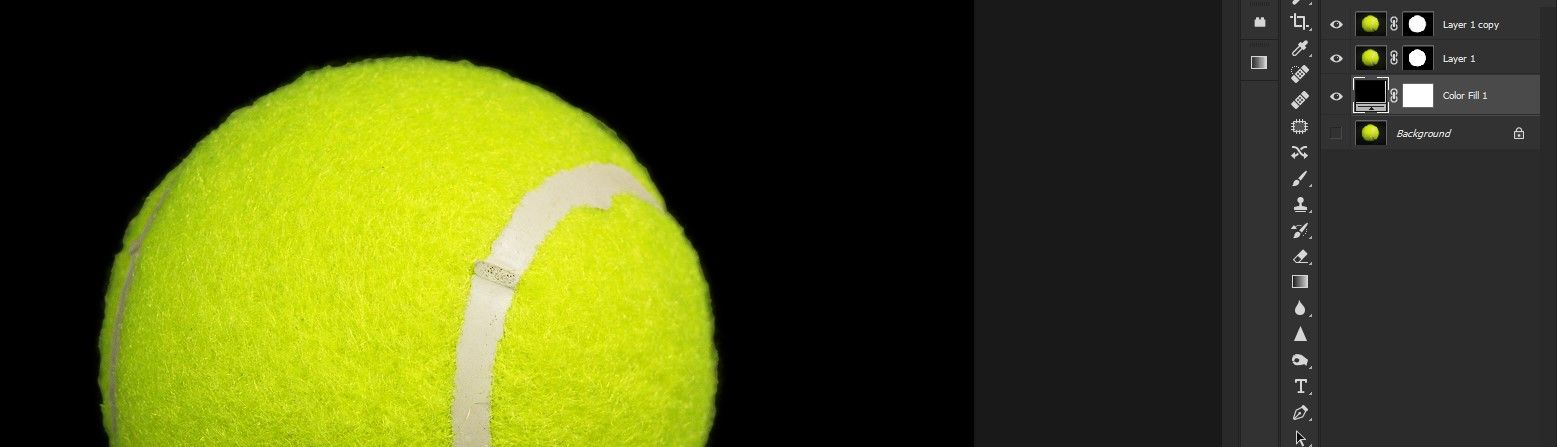
- With the image loaded in Photoshop, press Ctrl + J twice to create two layer copies.
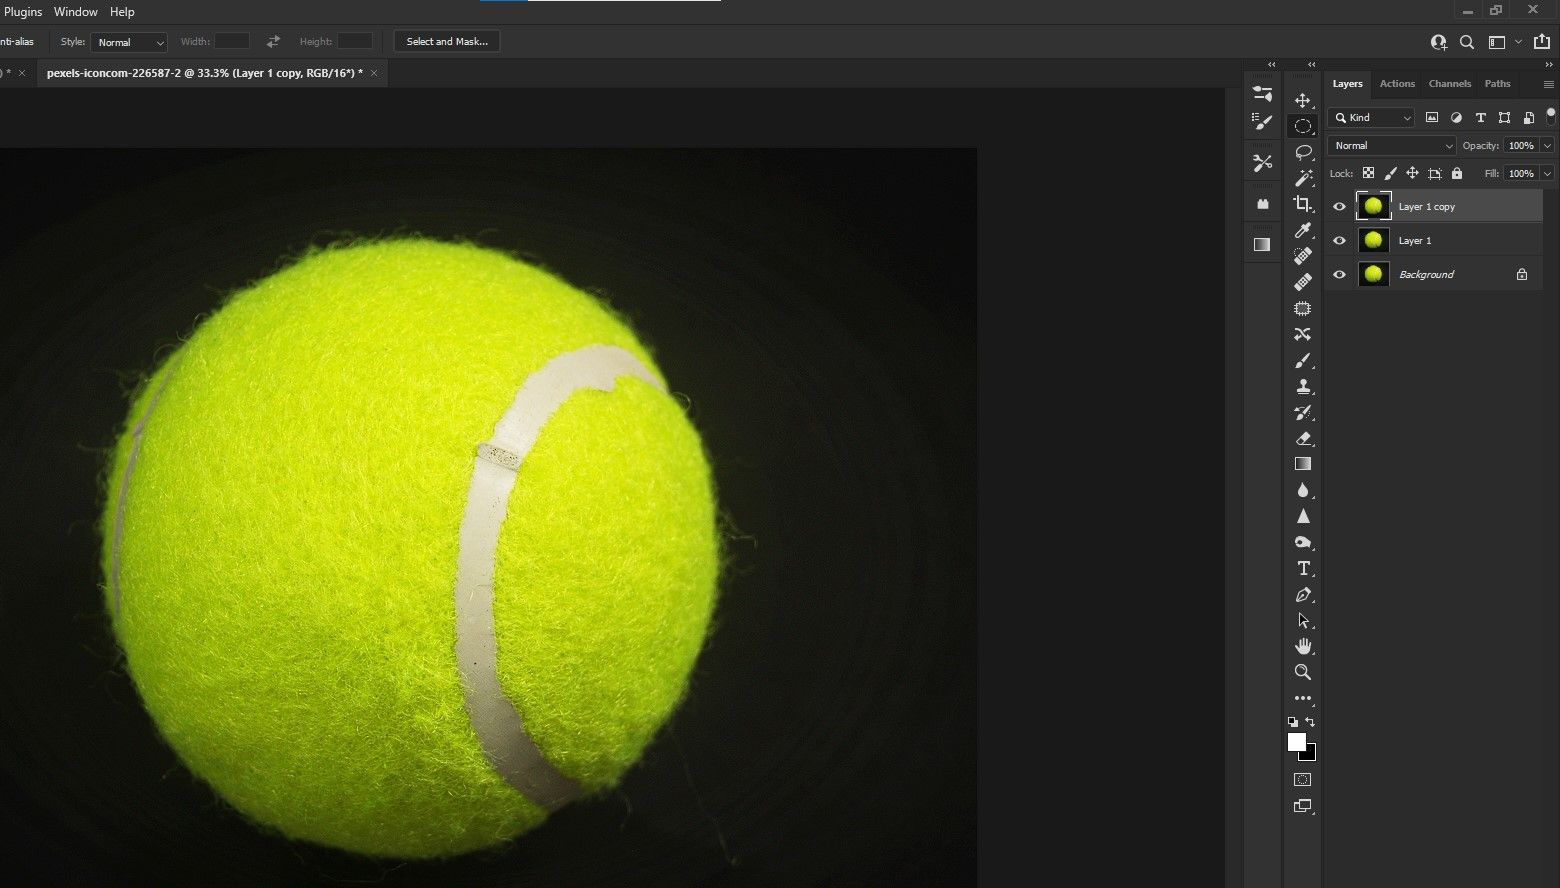
- Select Layer 1 in the heart of the layer stack. Go to Select > Subject.

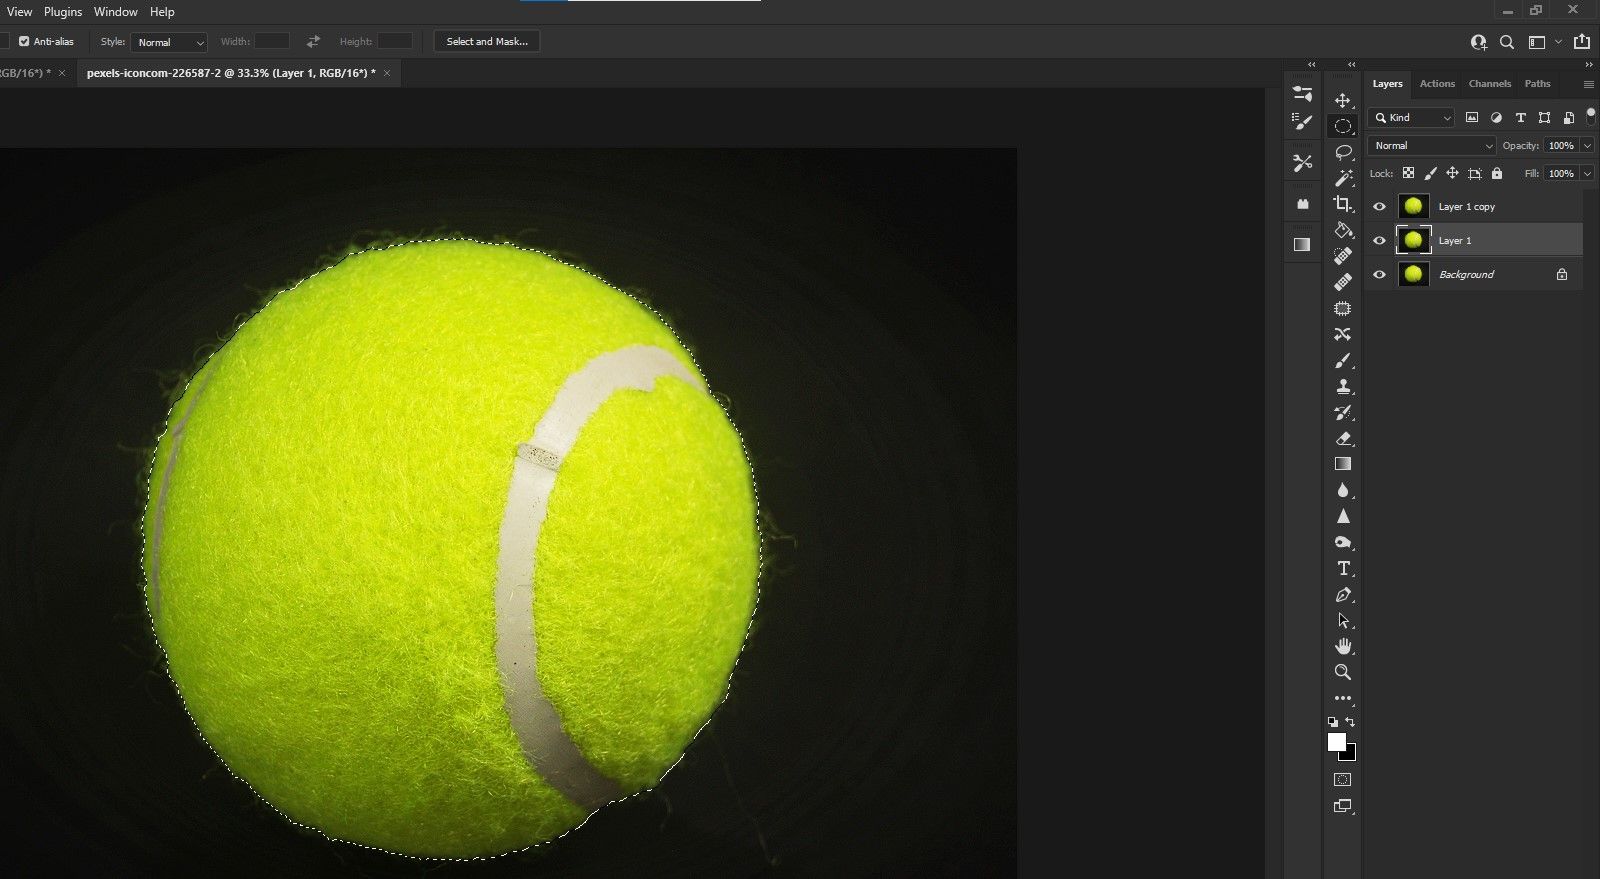
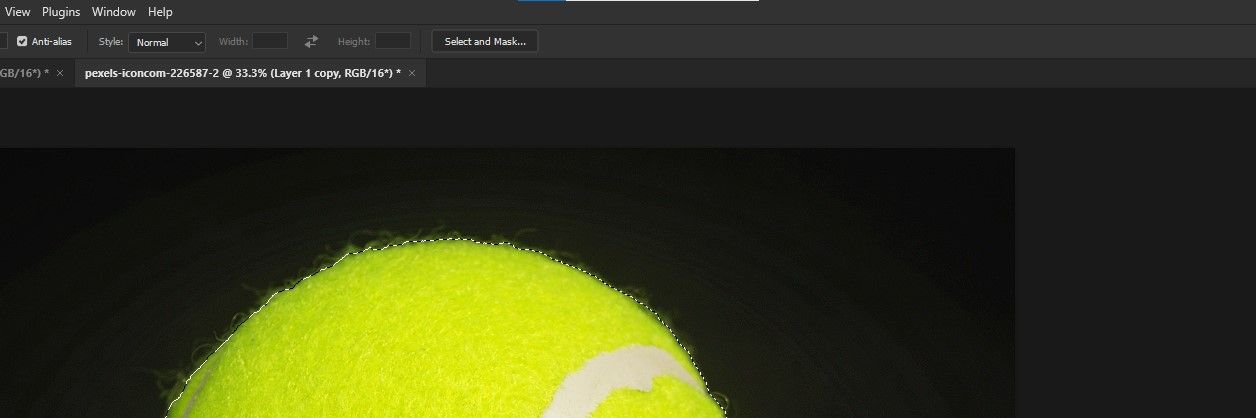
- A selection will be made around the lawn tennis ball. Click on Select and Mask.
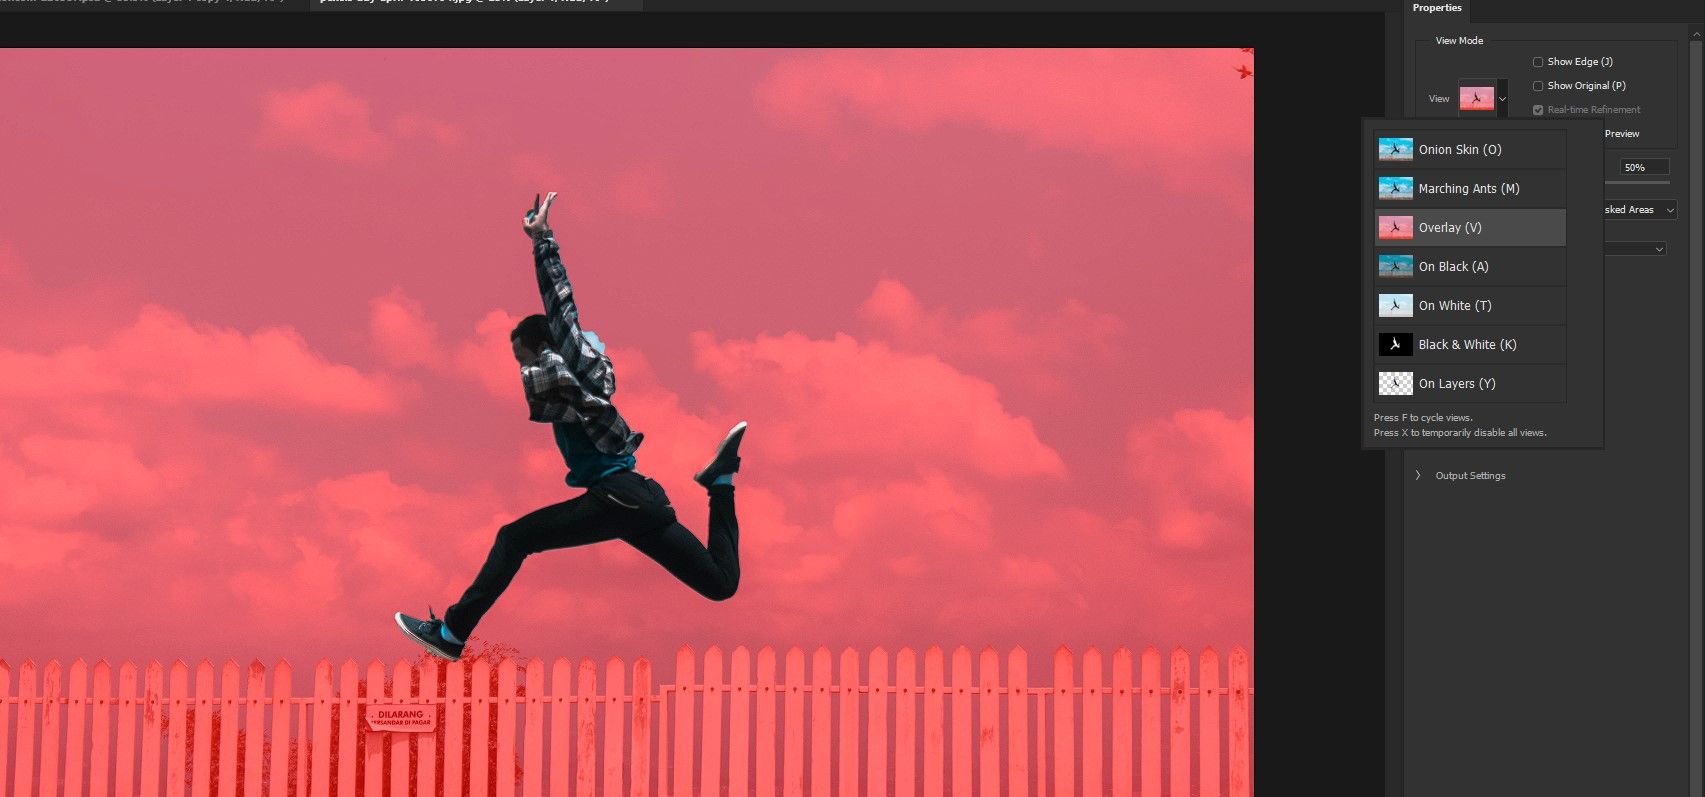
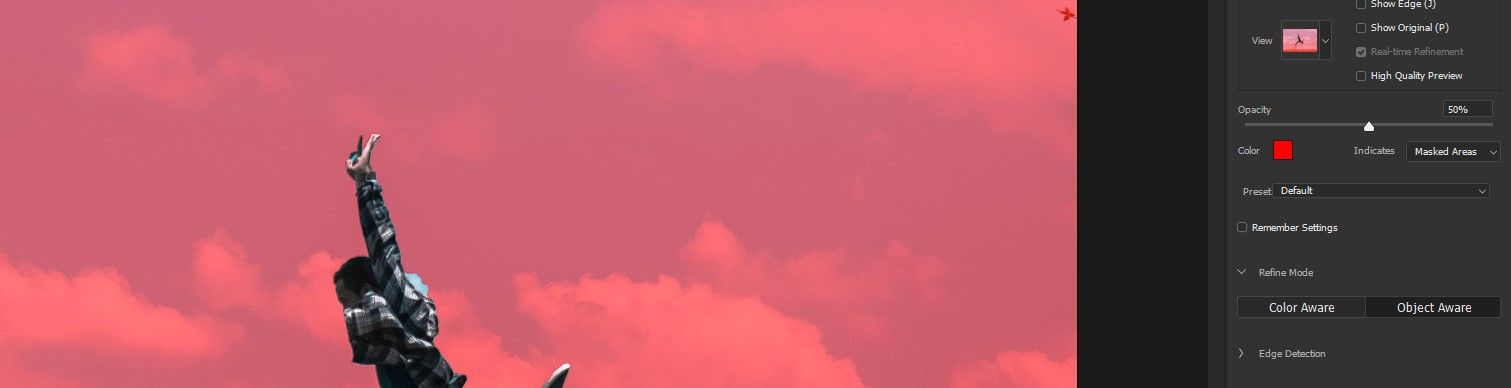
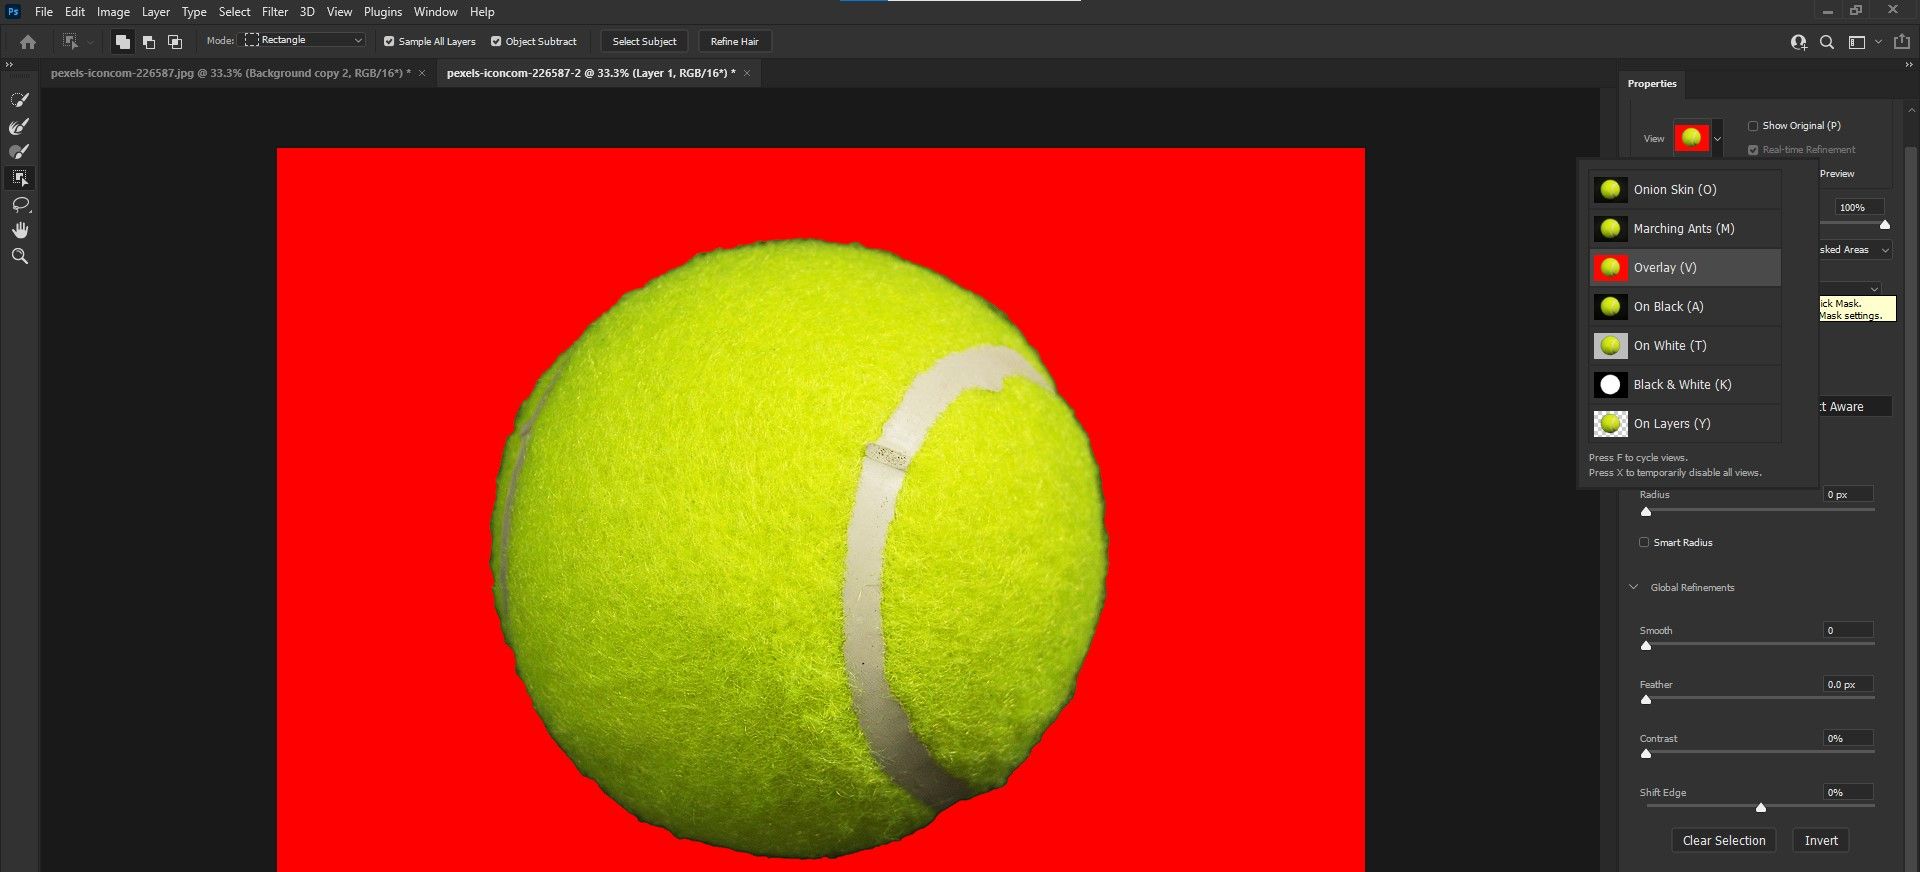
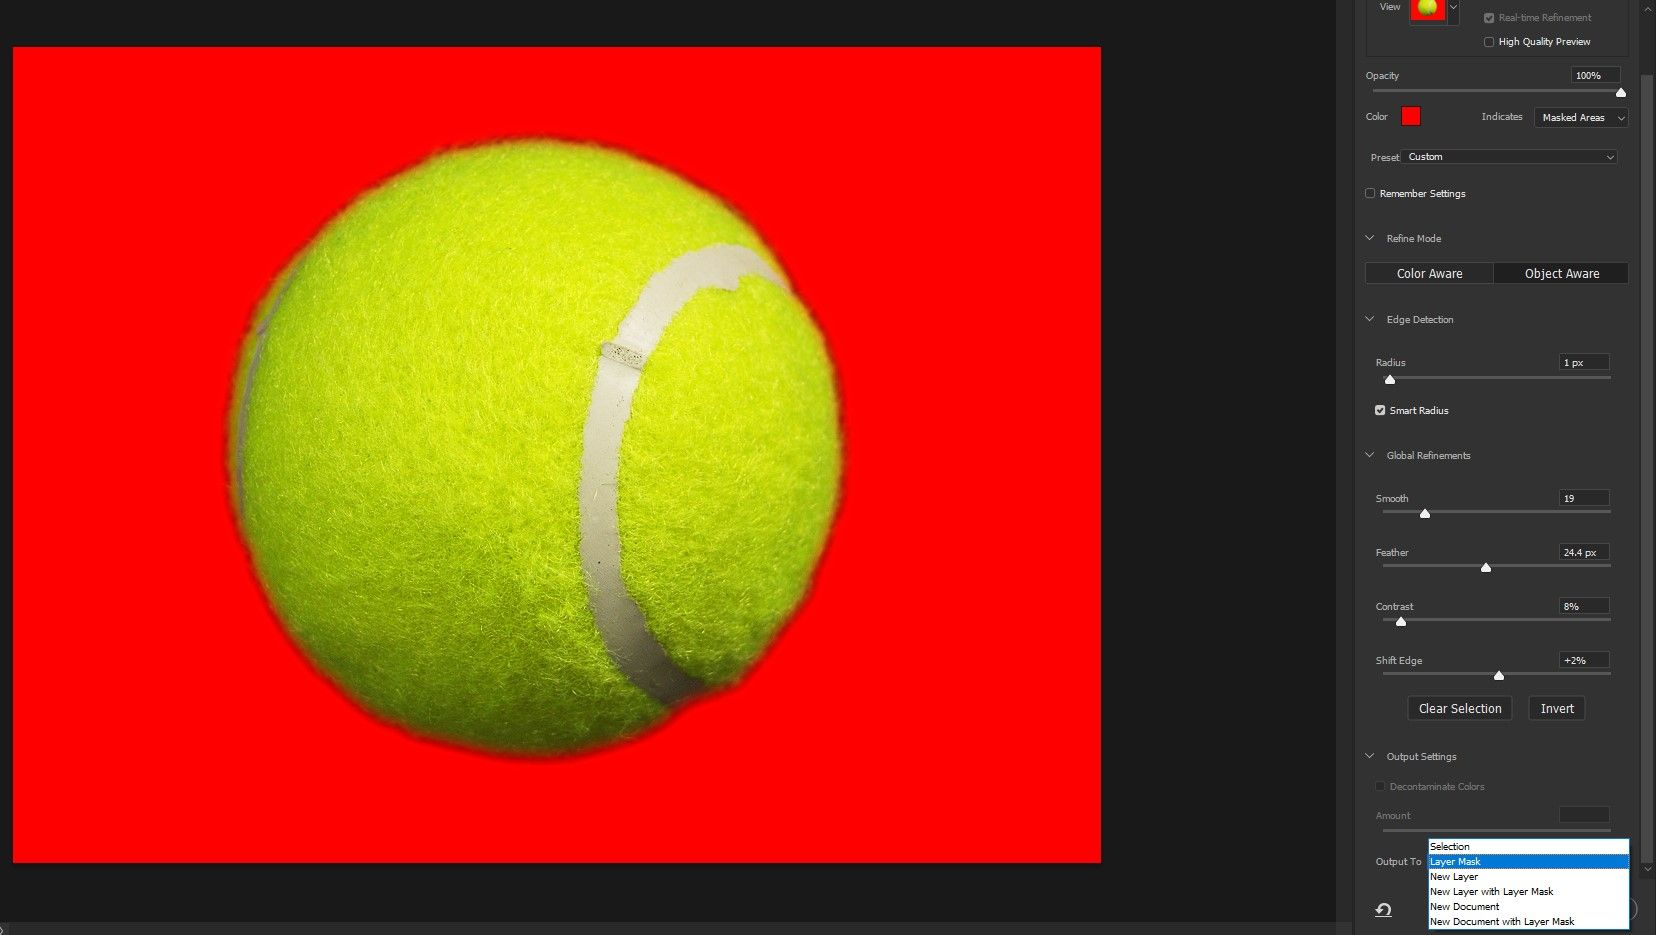
- In the Backdrop console, choose the red overlay from the View Way.
- Become to Output To at the bottom and select Layer Mask from the dropdown menu. Click OK.
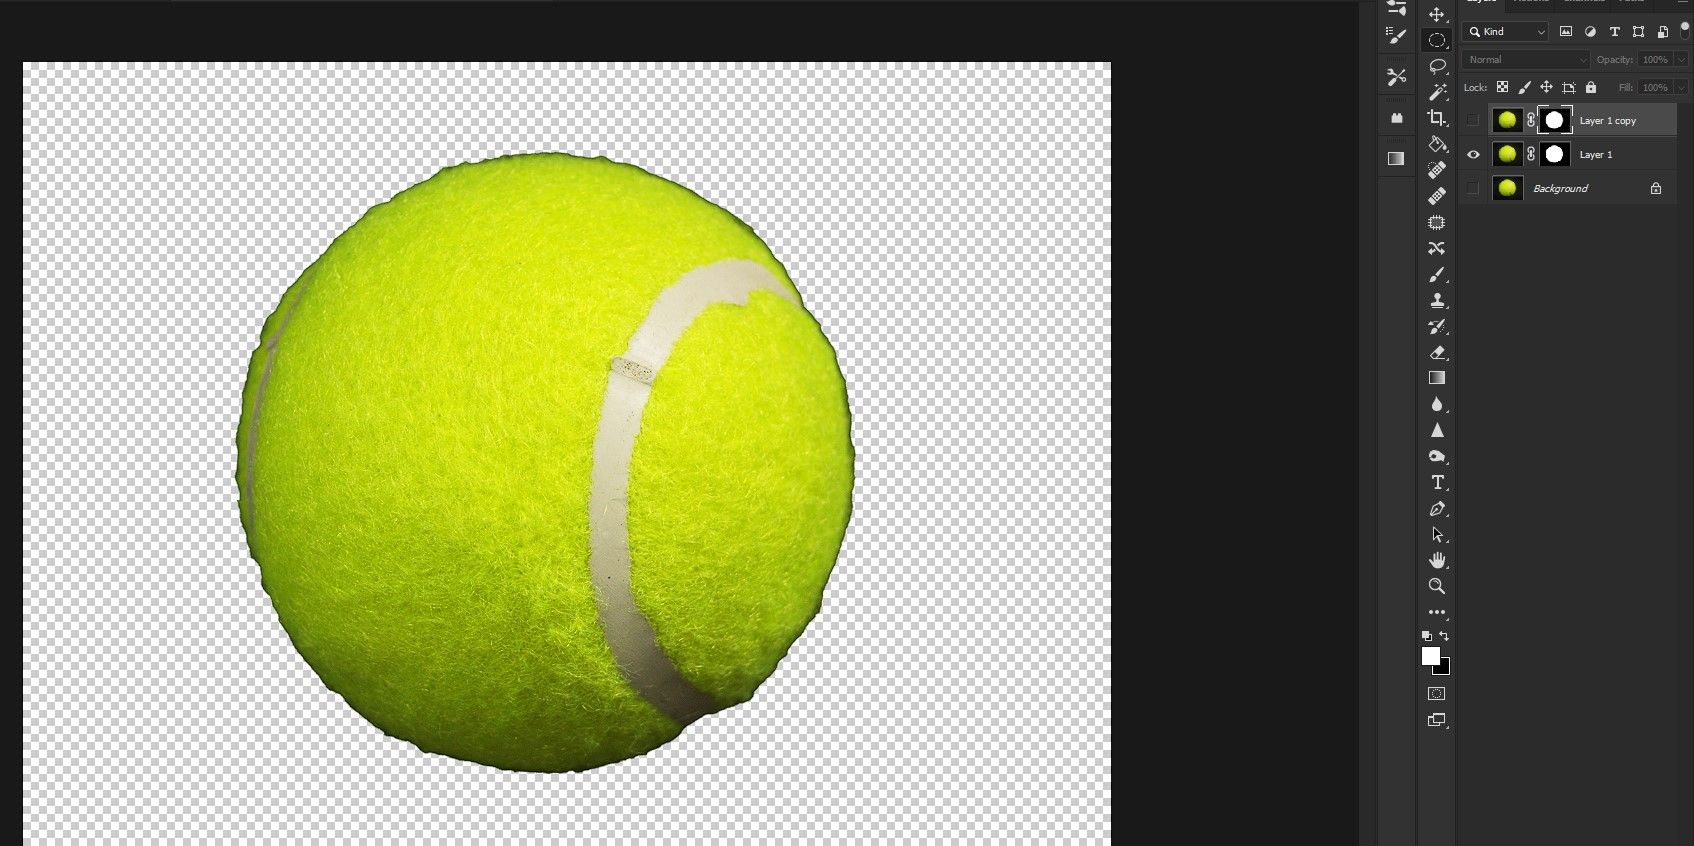
- Select Layer i Copy at the pinnacle of the layer stack. Go to Select > Subject.
- With the pick of the tennis brawl made, click on Select and Mask at the top.
- Enter the following values in the Properties menu on the right: Radius - 1 and check the Smart Redius box, Smooth - xix, Feather - 24.4, Contrast - 8, Shift Edge - + 2, and check Output To Layer Mask. Press OK.
We now take ii layer masks sitting on acme of the original image. The Layer 1 Re-create represents Photoshop'south automatic selection using the Subject Select feature. The top layer represents the custom values we've entered to create the best possible option of the tennis ball.
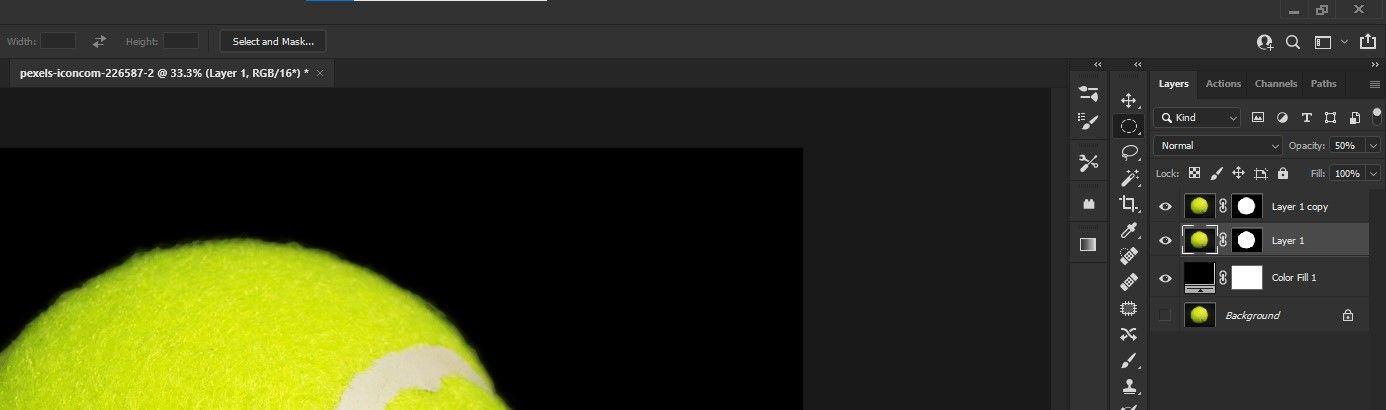
Audit the Layer Masks
In order to inspect each layer mask, uncheck whatsoever layers underneath the one y'all're looking at. We're going to examine the Layer 1 Copy. Uncheck both layers underneath to see the mask.
Layer i Copy Mask:
Observe how nosotros've created a soft selection here, where a fiddling bit of the fuzz appears. It's not what the tennis ball looks like in the original image, only nosotros'll prepare that subsequently.
Next, allow'southward inspect Layer ane by unchecking the Layer 1 Re-create above and checking Layer 1 every bit shown below.
Layer 1 Mask:
This mask was selected by Photoshop. Discover the edges effectually the tennis ball are dark, solid, and jagged? This copy is besides far from perfect. But we'll show you how to combine these masks to reap the best of both for the last mask.
Refine the Layer Masks
Now, we're going to take the best of both layer masks to create the perfect mask for the tennis ball. We're also going to create a solid black adjustment layer to replicate the black background of the original image, adjust the opacity, and perform a simple trick to perfect the terminal event.
Follow these steps:
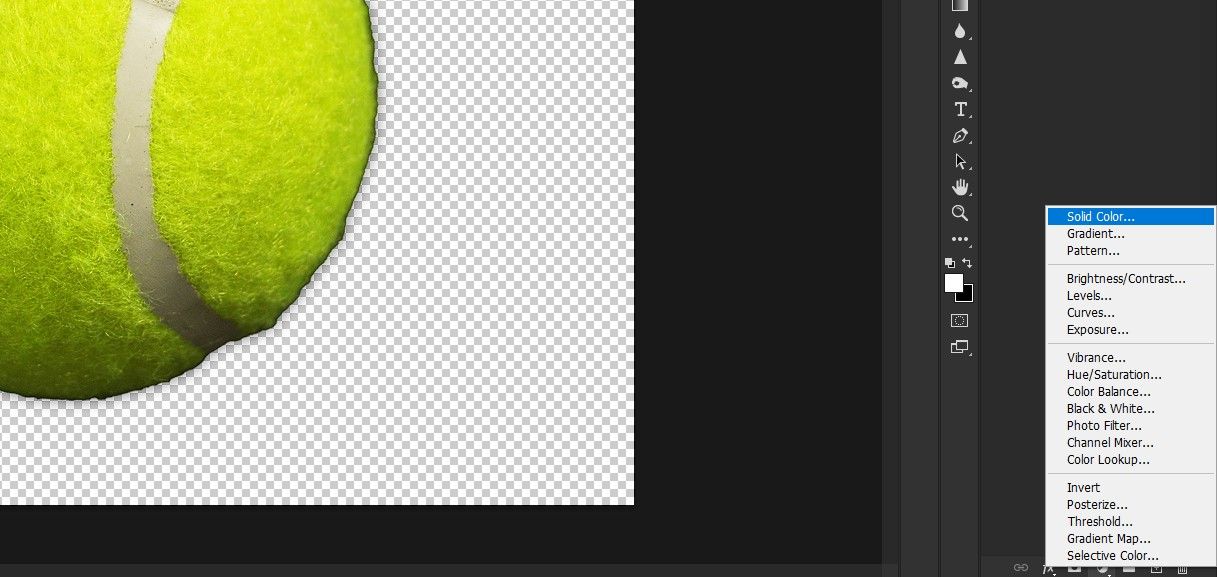
- Create a Solid Color adjustment by clicking on the adjustments icon at the bottom right of the screen.
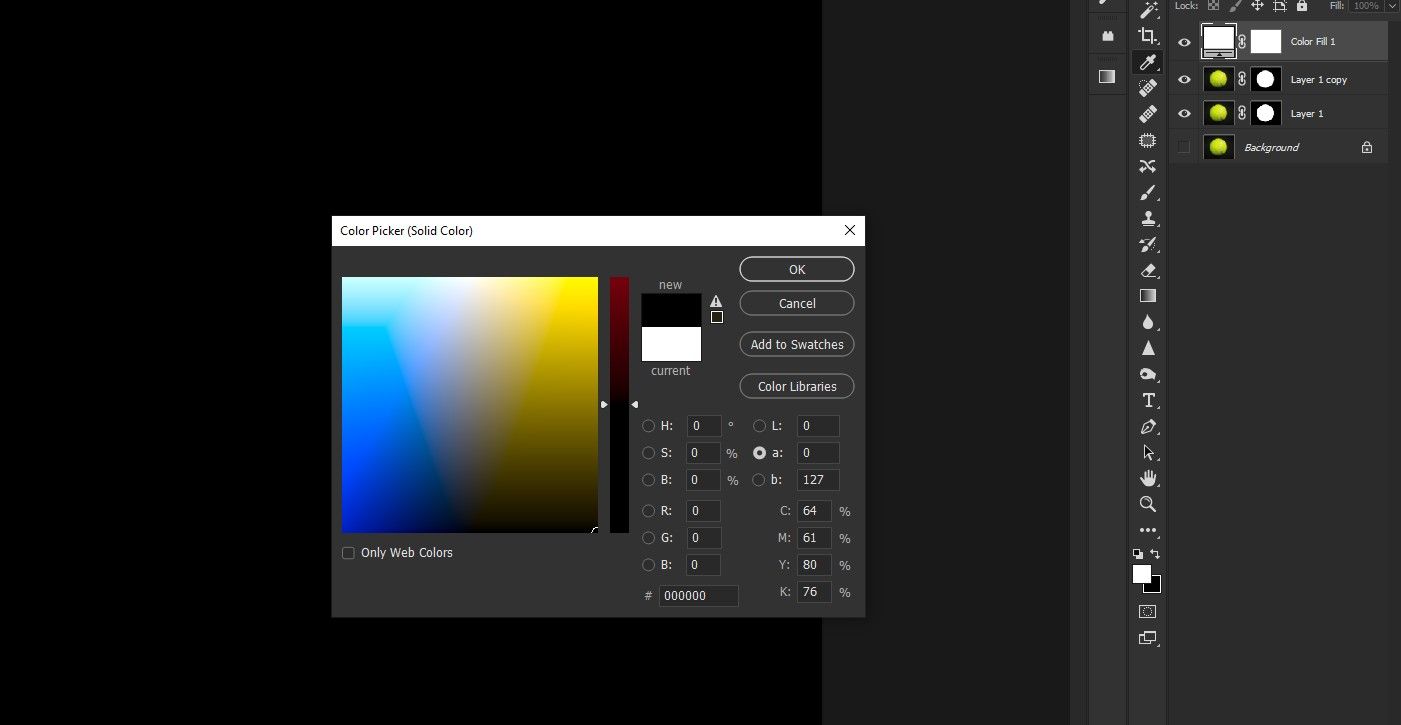
- Modify the color to black by dragging the circle down to the bottom-right corner of the box as shown below. All the values should exist at 0. Then click OK.
- Select and drag the Color Fill one layer down beneath Layer 1.
- Change the Layer 1 Opacity to l.
- At present for the fox; activate the Layer 1 Re-create and press Ctrl + J iii times.
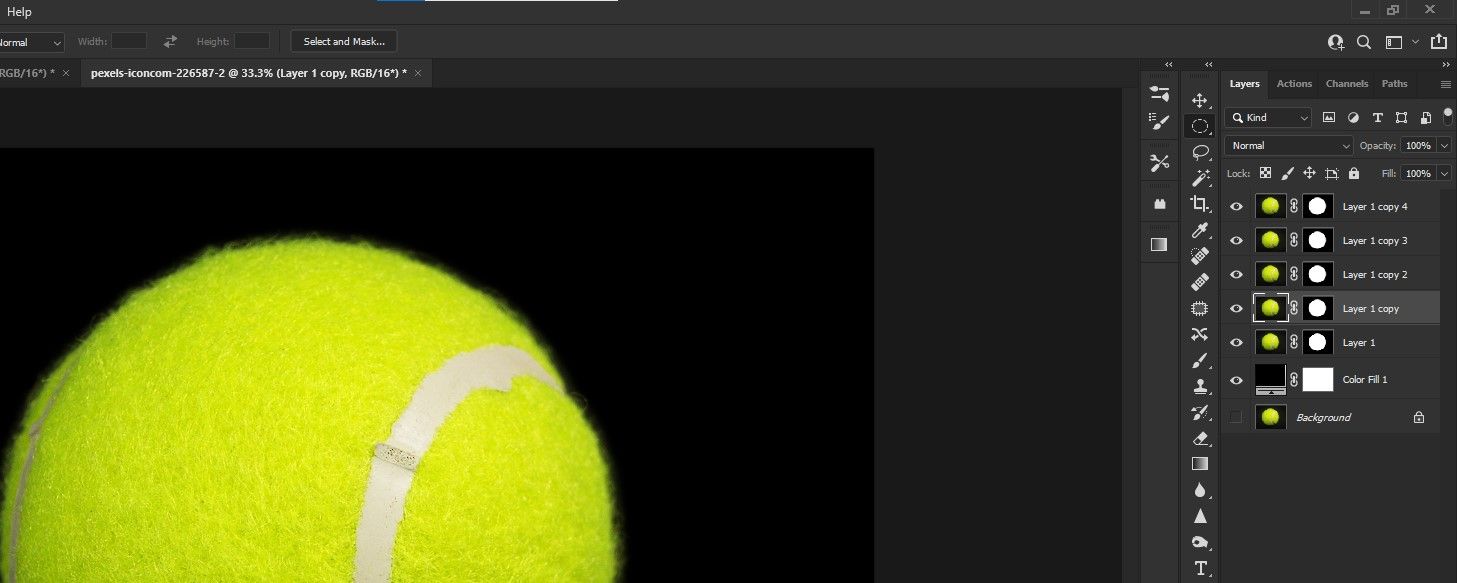
Observe how some of the fuzz re-appears? We at present take a more natural-looking tennis ball. This is considering duplicating a layer volition double the effect and create a more accurate mask.
Photoshop is always improving its selection and masking tools. Information technology'southward at present easier and quicker than ever to create more than refined masks.
Give this tutorial a shot; you'll be amazed at the detailed results y'all can get with the Field of study Select tool.
Source: https://www.makeuseof.com/how-to-mask-subject-photoshop-using-subject-select-tool/
Posted by: millerpearom48.blogspot.com
0 Response to "How To Use The Select And Mask Tool In Photoshop"
Post a Comment